Sa360 Facebook Integration 8211 A Step By Step Guide To Tagging Your Facebook Ads For Use With Search Ads 360

Management Summary
Search Ads 360 is a tool from the Google Marketing Platform that makes it possible to make the most of your search engine data and react to the market in real time. One of the goals of SA360 is, among other things, to provide a holistic view of all your performance channels and thus enrich bid automation with even more data. Of course, your valuable Facebook data shouldn’t be missing either. Tracking and reporting your Facebook metrics in Search Ads 360 not only provides the system with more data. This also allows the attribution model to learn even more precisely and cross-channel remarketing is made possible.
In the following guide we will take you by the hand and guide you step by step through the setup of the Facebook integration in SA360.
Overview of the steps required
- Set-up and publication of Facebook campaigns
- Creating a custom column view in Facebook Ads Manager
- Exporting ads from Facebook Ads Manager
- Upload the export file to SA360 (SA360 supplements the target URLs with the Clickserver URL parameters)
- Download SA360 export file
- Import the SA360 file into the Facebook Ads Manager
Search Ads 360 & Facebook Integration – Step by Step Guide
1. Before the ads to be tagged can be exported, they must first be published in Facebook Ads Manager.
2. Open the ads layer in Ads Manager. Select the ads you want to export by checking the box. Please note the following points before preparing the ads for export:
- Placement personalizationsmay only be done after the SA360 tagging process, otherwise an error message will appear in SA360.
- Useno emojisin your ad texts, these are overwritten by SA360 when tagging. The emojis can of course be added again after tagging via bulk edit, for example.
- The ad formatInstant experienceSA360 tracking URLs cannot be added. As a workaround, you can create an image ad, add the tracking link and only convert it into an instant experience when you publish the ad.
3. The column view in the ad manager must be customized before export so that all ad information required for tracking can be transmitted.
Customize the column view with the following columns:Campaign ID, Campaign name, Campaign objective, Ad set ID, Ad set name, Ad ID, Ad name, Destination URL. (Tip: It’s best to save this column view as a custom view for future exports)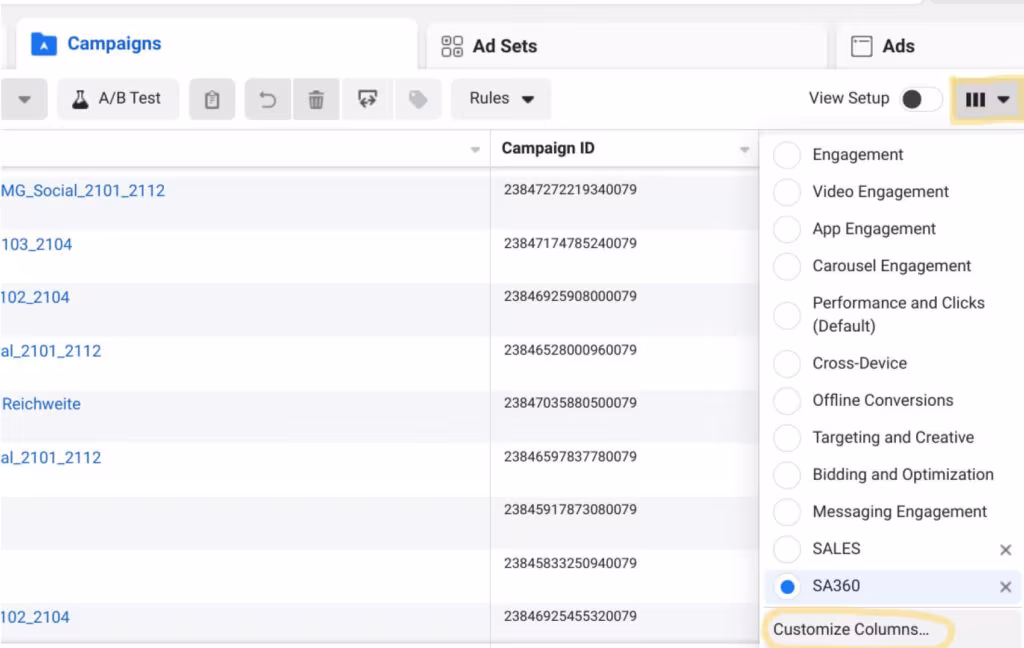 SA360 Facebook Integration Guide – Step 3: Customize column view
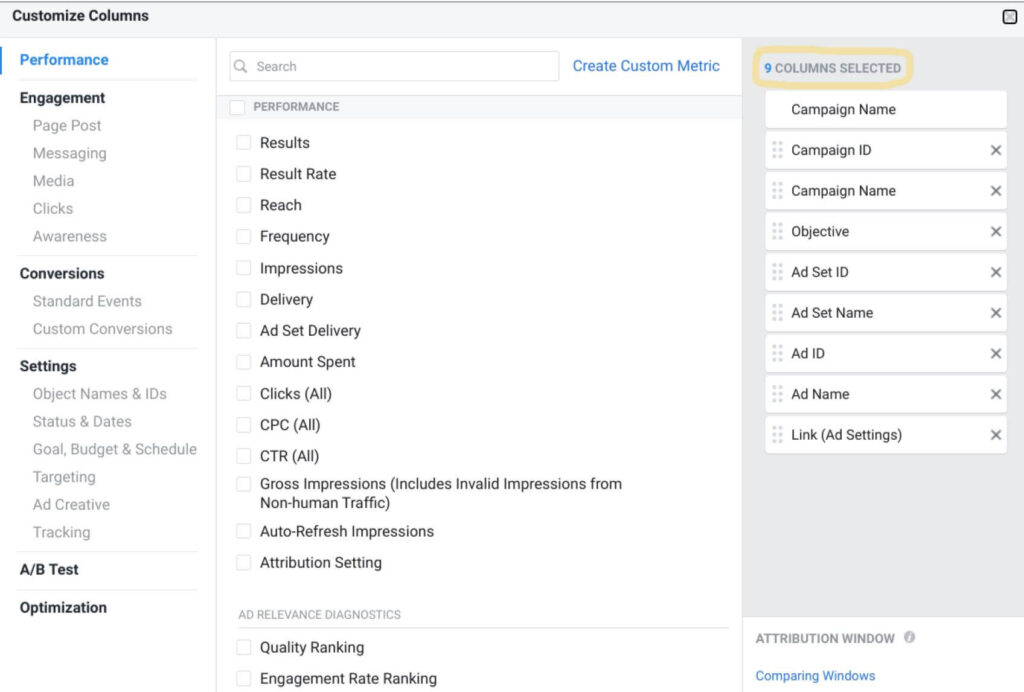 SA360 Facebook Integration Guide – Step 3: Customize column view
4. Export the selected ads in CSV format.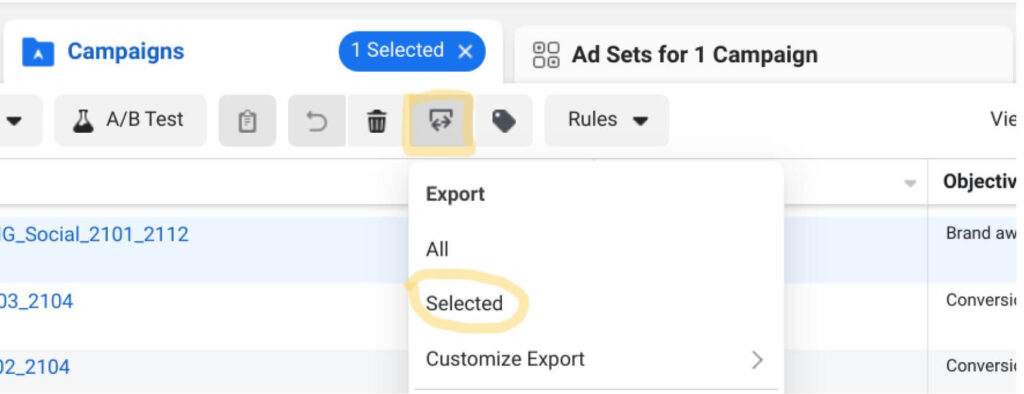 SA360 Facebook Integration Guide – Step 4: Export in CSV format
5. Open SA360 and upload the file as follows:
- In the left navigation menu, click on the “Uploads” tab and select the “Social Networks” tab.
- Select “Campaigns downloaded from Engine”.
- Select your Facebook account
- Upload CSV file
- As soon as the status shows “Completed”, the links have been successfully supplemented with the tracking parameters. Download the finished CSV file again.
 6. Switch back to the Facebook Ads Manager and import the CSV file with the customized URLs. Pay attention to error messages.
Conclusion:
Get even more out of your data with SA360 Social Integration. In six simple steps you can get your Facebook campaigns ready to use their full potential. Your Floodlight tags can now also measure Facebook performance, creating an even more accurate attribution model. Remarketing can also be used and reporting is now more uniform.