Server Side Gtm And First Party Mode Implementation In Gcp

Management Summary
In my last blog article “Server Side GTM and First Party Mode: More control, fewer restrictions“I have written theoretically about the topic of Server Side GTM (ssGTM) in combination with First Party Mode (FPM). Now it will be about the practical implementation and how you can set up a quick test setup within GCP.
Implementation of first party mode with server side GTM in GCP
This test setup is intended to better understand the advantages and necessary changes for the switch to first party mode. This is a minimal setup within GCP and probably does not need to be expanded or adjusted for productive operation.
The following is needed if you want to recreate this test setup:
- A GCP project with active billing and sufficient IAM rights
- A registered domain
- An ssGTM setup via Cloud Run
- A csGTM container
- A GA4 property
Step 1: Website Setup
As a test website we will use cloud storage within GCP. This service allows us to host static websites in a very simple and fast way:https://cloud.google.com/storage/docs/hosting-static-website.
If you follow these instructions, the end result within GCP is an HTTP load balancer that routes all traffic to a cloud storage bucket. This bucket in turn contains a static HTML file, which we will customize in the following steps. Last but not least, the external IP of the load balancer was linked to our registered domain using A Record.
Step 2: Client Side GTM
For our test, we want to load the Client Side GTM (csGTM) via the ssGTM, as is generally recommended. The code example in theGoogle instructionsUnfortunately it is not entirely correct or the code snippet does not refer to the combination with ssGTM, which we want to implement here.
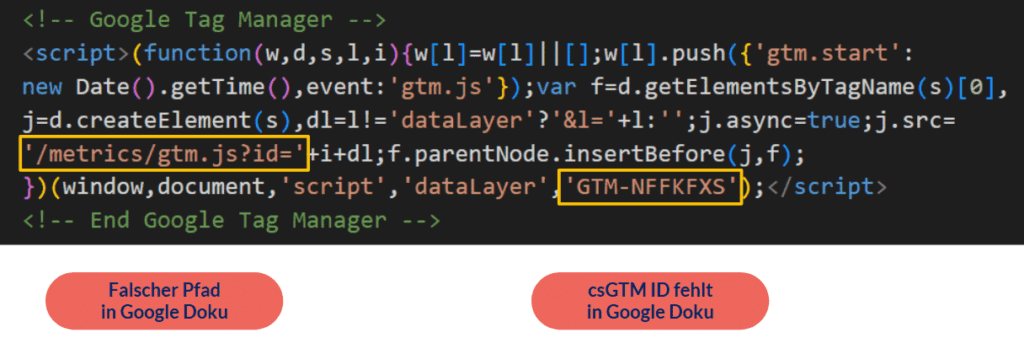
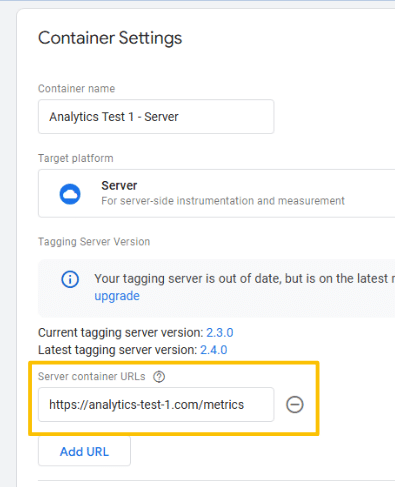
I have as tracking path/metricsselected, but any path that has not yet been used can be selected here.
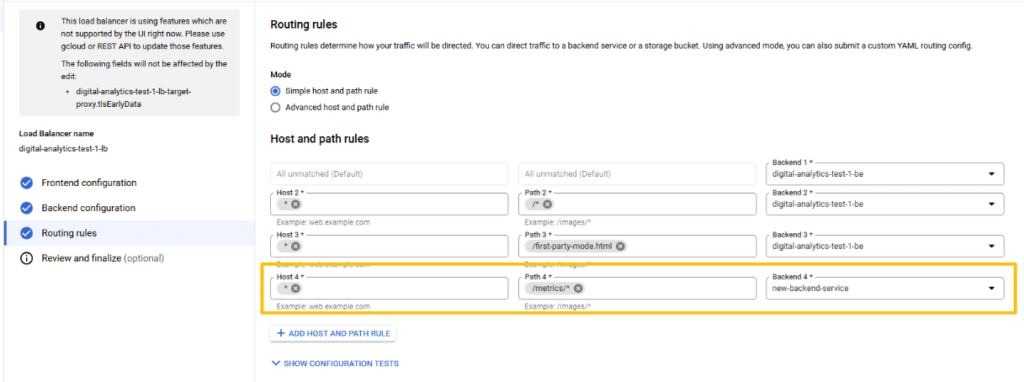
Step 3: Customize load balancer
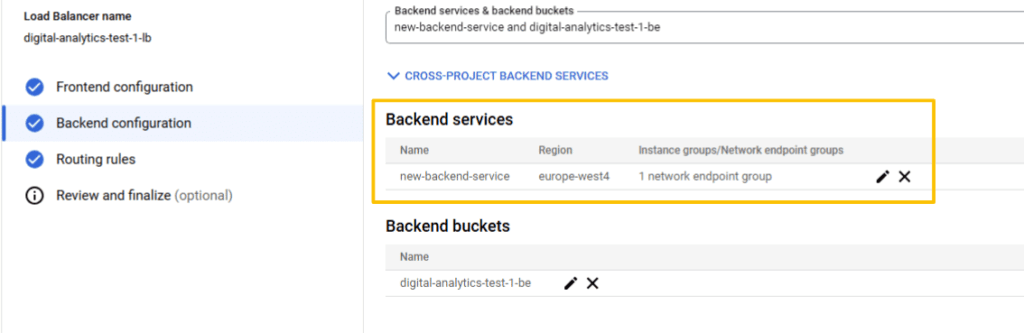
Next, we need to customize the load balancer we created earlier. This must forward all requests that are sent to the tracking path /metrics to the ssGTM.
To do this, we need to create a new backend service, which in turn points to our ssGTM Cloud Run production service.
In the code snippet above you can see that the gtm.js file is specified relatively in the csGTM code snippet. If our website has different subdomains, the Google libraries would therefore be loaded via different subdomains, which in turn is problematic for the ssGTM preview mode, as it can only be started for a specific subdomain.
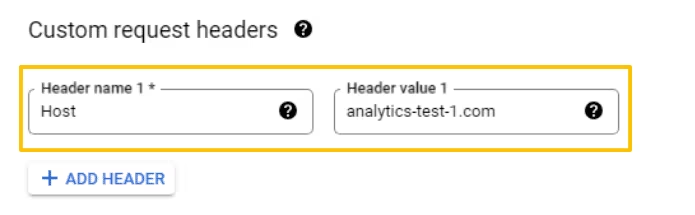
To solve this problem, we can always set the host header to the main domain in the newly created backend service. In this way, with ssGTM everything always arrives under the main domain analytics-test-1.com and subdomains are not taken into account.
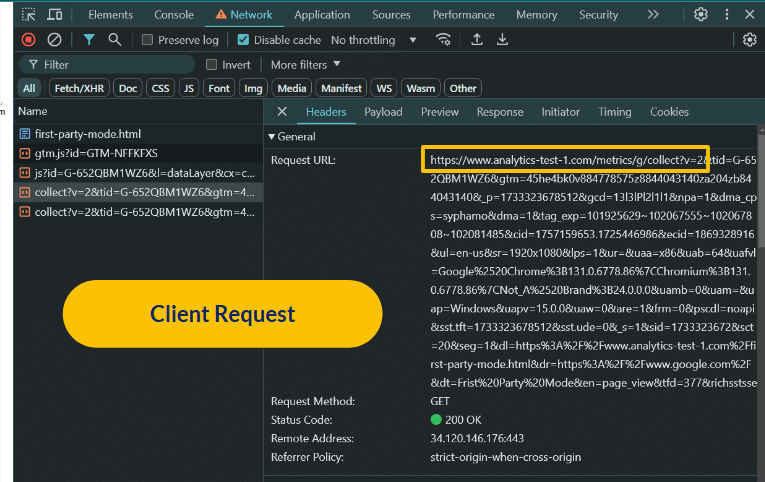
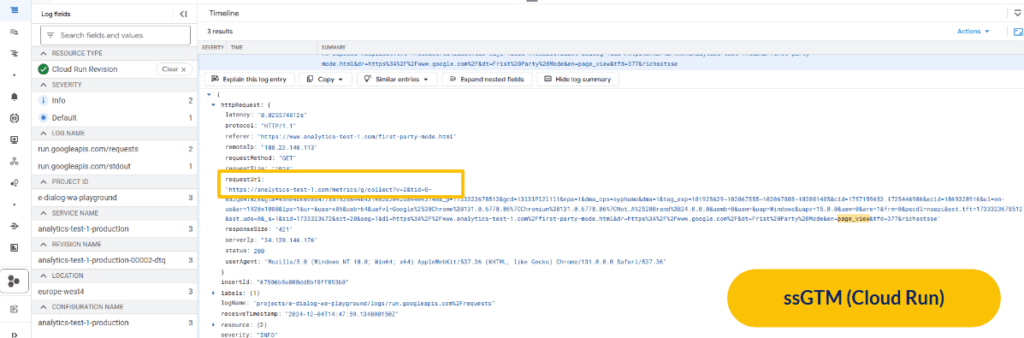
Using developer tools and cloud logging, you can then check whether overwriting the host header actually works. You can see that the subdomain “www” is no longer included in the third screenshot.

My guess is (but not yet tested) that you could do without the custom request header if you simply load the csGTM via an absolute path. In our case via: https://analytics-test-1.com/metrics/gtm.js?id= instead of just via: /metrics/gtm.js?id=
The last necessary adjustment to the load balancer is to add a new routing rule. This will forward the tracking requests from /metrics to the ssGTM.
The setup can then be tested using these two URLs, both should return “ok”.
https://analytics-test-1.com/metrics/healthy
https://analytics-test-1.com/metrics/?validate_geo=healthy
Step 4: Customize GTMs
In the csGTM, the server URL must now be adjusted in the GA4 Config tag.

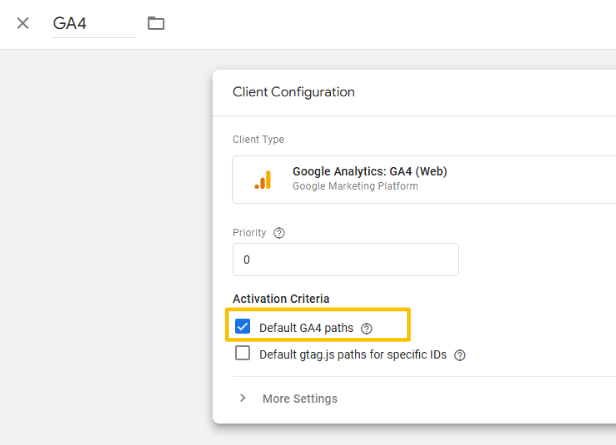
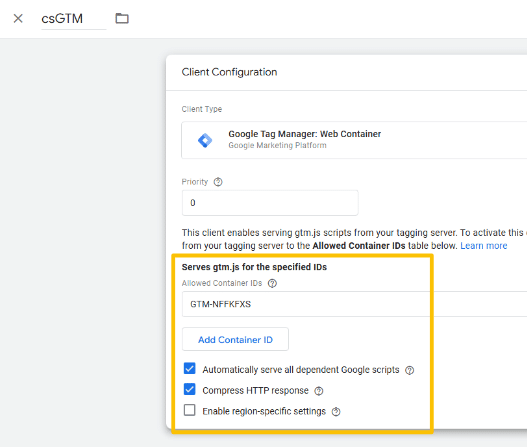
The GA4 client in ssGTM must have “Default GA4 paths” enabled, and the GTM client must allow “Automatically serve all dependent Google scripts”. Furthermore, the ID of the csGTM must be entered.
In order for the preview mode to work, the server container URL must be adjusted in ssGTM.
Step 5: Testing
To check whether the csGTM, the GTag library and the GA4 tracking requests are sent to the ssGTM via the new tracking path, just look at the Network tab of the Dev Tools.
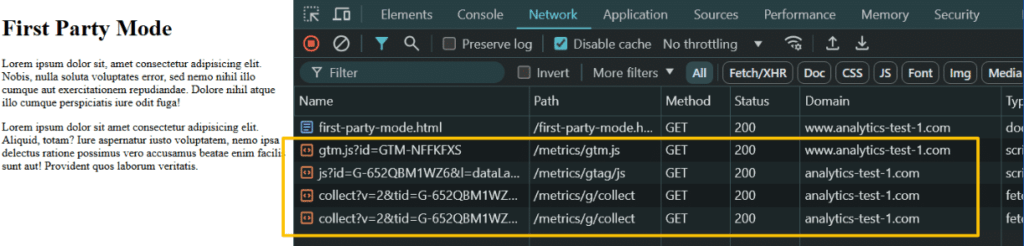
Here we can see that all tracking happens via the new /metrics path.
Notice
One last note: Officially, the first party mode is in beta mode (as of December 30, 2024). During testing with the setup described above, everything worked as expected and I didn’t notice any problems.
Nonetheless, as always, I would recommend allowing some time to validate the collected data after switching to first party mode to ensure that everything is working as intended.
Conclusion
The combination of Server Side GTM and First Party Mode offers advantages in terms of data protection and flexibility. With these instructions, technically experienced people can create a minimal setup in order to gain initial experience with it.
Interest? Contact us:kontakt@e-dialog.group
all graphics – source: e-dialog